Cottage Breakfast Room

Sep 4, 2013

I've been searching for a new table and chairs for my breakfast room for several months. You may have noticed my black table with the mahogany top. This is the best picture I have of it.


It's always been too big for this space, but it was the smallest table I could find that would fit our family of five at the time. Not only was the size wrong, but the chairs have become really unstable and the finish has taken a beating. My kids are a bit older so I'm ready for a better quality table, but accidents happen daily around this house. It can't be so expensive that I will have a heart attack if it gets damaged. I really took my time and casually looked around the last few months. I also pinned several images for inspiration and I was surprised I'm leaning toward a cottage style since I just finished my transitional master bedroom. Here are some of my favorites.
Breakfast Room
soft blue + green is always a calming palette like in this breakfast nook!
Love this window seat dining area! Clever!
Love the bold colors paired with natural finishes.  Beautiful dining space!
Frais Du Verger Pear by Ballard Designs  I  ballarddesigns.com
Add excitement to a black and white kitchen with a graphic backsplash.
I love the upholstered seats and rugs, but it's not really feasible with kids. I also like mixing the finishes of the tables and chairs. After searching for a reasonable priced round table, I found Pier 1 has the best selection. If you pick it up at the store there is no delivery charge and it took less than a week to come in after placing my order.


I decided on the Ronan pedestal extension table instead, which is a bit more expensive. It's an off-white, which is perfect since my kitchen cabinets are not bright white. Here it is with the leaf in it, which is too big for my breakfast room. It's nice to have the option to make it bigger in case we need the room or we move to a home with a bigger breakfast room. Don't worry, I'm not planning on moving. Remodeling this house has exhausted me!


Here it is in my breakfast room!

DSC_3356

I was surprised to find that I could comfortably fit five chairs around it. I initially planned on just putting four chairs with it, which isn't a big deal since we rarely sit down as a family at the same time. My husband and I prefer to wait for the kids to finish eating before we sit down so we can have peace and semi-quiet. But, when my kindergartner came home from school he counted the chairs and counted the people in our family on his little hands and looked really confused. After a moment, he wanted to know where his oldest brother is going to sit, lol. I pulled another chair up to the table to make him feel better.

I'm leaning towards these chairs from World Market.


I love the French bistro style chairs, but these are the only ones I've seen without a woven seat. We've had woven seats and they do not hold up with kids. These are extremely popular though and were sold out when I went to the store last week, but I just received a phone call last night that they are back in stock. I've got to make a decision fast before they sell out again. I hope to have an update for you soon!

Five Easy Steps to An Organized Kitchen

Aug 22, 2013

I have organized and reorganized my kitchen cabinets too many times to count. Some areas stay organized and some are back to a chaotic mess within weeks. After almost ten years in this home, I've finally realized why and I've narrowed down kitchen organization to five simple rules.


1. Don't stack items you use regularly.


DSC_3313

Instead of stacking items on top of each other, use a shelf to maximize space. This cabinet holds small kitchen appliances and has stayed looking just like this for the past two years.

I took this same concept and repeated it with the rest of my small appliances. I stole the other white shelf from my island cabinet and now it holds a tray I haven't used in years. I put smaller items and appliance accessories in it. Rarely used items, like my breadmaker, sits in the back.

DSC_3314


2. Make it easy to get items out of the cabinet.

The white shelf above used to be in my island for bakeware. I stacked cookie sheets and cutting boards on top and baking pans underneath. Not only did stacking the cookie sheets and cutting boards create a mess, but I could not get them out because of the center cabinet beam. I had to find the right one, slide it out from underneath the other pans, and then turn it sideways to avoid the beam. I ended up putting a ton of nicks in the center beam that way.

DSC_3311

I decided to use my saucepan lid holder so the cookie sheets can slide right out. I also don't have to stack them on top of each other any longer. Behind the center beam I stacked items I don't use often, like my Tupperware cupcake holder and springform pans.


3. Store items with the lids on.

DSC_3318


DSC_3308

I had a saucepan lid holder (that now holds the cutting boards and cookie sheets), but I never actually used it. Also, when the lids were separated I had to go through each one to find the correct one. What a pain!

Some may find an upper cabinet a strange place to hold saucepans, but it is so much better than having them in a deep base cabinet. I used to take out the pans in the front to reach the ones in the back. When I unloaded the dishwasher I just threw them in the bottom cabinet and shut it hard so they would stay. I know I'm not the only one that has done this!

The deep corner base cabinet now holds my bakeware. Lesser used items are in the back (actually never used items, lol). I use the three glass pans on top the most so I made sure I can slide those in and out easily. The shelf above (not pictured) holds my fry pans in the same way.

DSC_3309


The other deep base cabinet in the corner holds serving ware I don't use often, which is why they are stacked. The holiday serving pieces are stacked together on the right. I didn't even know I owned some of these things!

DSC_3316


More bakeware that is not stacked (minus the measuring cups) because I use them often. These are in an upper cabinet for easy reaching, too.

DSC_3317


Outdoor serverware

DSC_3315


4. Collate smaller items into bins.

DSC_3321

Medicines are stored in one bin. I've had this one for years and only go through it when it gets full to throw out old meds. The only problems I had with this is when the band-aids would get loose and collect at the bottom.

I decided to put them in a separate container with the antibiotic ointment. Now, I can take this box to where the injured person is sitting. It's actually a pencil box I bought at Wal-Mart for less than a dollar. I have another box like it for batteries that you can see in the picture above.

DSC_3325


Another bin holds things we use often-outdoor things, measuring tape, matches, super glue, pool stuff.

DSC_3322


5. Stack lesser used items and store them in the top or back of the cabinets.

DSC_3319

I have two sets of china on the upper shelves. In case you're wondering, all of those loose papers are recipes I printed out from the internet. If they're good I transfer them to a card in the recipe box. I obviously have a lot of recipes I need to try!

Everyone has different items and sized kitchens, but just following these few rules has helped me get and stay organized. The best part is you don't need to buy expensive organization items. All of mine were bought at Wal-Mart. Feel free to share your best tips!

A Mini Summer Vacation

Aug 19, 2013

This has been a weird summer. I haven't gotten much accomplished, but I've been busier than ever. I've been slacking on my housekeeping, rarely going to the gym, blogging only once a week, barely making it out the door to work, not doing my normal DIY projects, etc. I still can't figure out why I'm constantly moving and not getting anything done. My kids are being entertained via Xbox and it's been making me feel really guilty. I also didn't want to send them back to school without some sort of summer vacation.

On Friday, I planned a spur of the moment trip to San Antonio. We decided to spend Saturday afternoon at Natural Bridge and Caverns and all day Sunday at Sea World. My kids had mixed feelings since we usually go to Six Flags Fiesta Texas and The Alamo every year. They have a strange fascination with The Alamo and can tell you all about it-who was there, the date, how many people fought and were killed, where Jim Bowie and William Travis are buried, etc. It's different, but I'm weirdly proud. I was never interested myself, but seeing it through their eyes makes me see it in an entirely different light. I swear I'm turning into a boy sometimes! Sea World and some caves sounded so boring in comparison to roller coasters and imagined gun battles. Thankfully, they were pleasantly surprised by the roller coasters at Sea World and how immense these caves really are.

Natural Bridge and Caverns

IMG_1507


IMG_1509


IMG_1516

Excuse the terrible cellphone pics! In my hurry out the door I completely forgot my camera. The kids thought the caves were going to be small like Huck Finn's island at Disney World, lol. My older son said, "This is so cool!" Yes, it is!

We headed down to The Riverwalk that night for dinner.

IMG_1527

It really is an awesome place, but the crowds and parking are a nightmare. We've been here enough that I really don't feel the need to come down here every time we visit. I'd rather stay a little further out by the parks. We always stay at the same place because we can get a two bedroom suite with a living room, but one day I'd like to stay at The Hyatt Hill Country Resort. This is why!


There's a golf course, spa, sandy beach, lazy river, marshmallow roasting, surfing (yes, surfing), etc. Maybe next time?

We didn't spend much time at our hotel though since we got up early on Sunday for a full day at Sea World.

IMG_1531


I might have gotten a little carried away with the "fun frames" on the Sea World app.

IMG_1549

I think some back to school haircuts need to be on the agenda this week after looking at this pic, lol.

Take note of where we're sitting...

IMG_1540


IMG_1545

This is right before we got completely soaked by Shamu. My older two sons thought it was awesome. My five year old was not thrilled at all. He walked around the park all day saying,"I don't like Shamu. He got me all wet." The boy can hold a grudge because this morning when I told him he needed to take a shower since he smelled like Shamu water, I heard him mutter under his breath, "stupid whale." Hahaha! Don't worry, he had a good time. Actually, we all had a great time. I think one night getaways are perfect because there's no vacation fatigue, and very little packing and unpacking to do. We're going to have to do this more often. Now, it's back to reality, aka housework!


It's Back-to-School Time!

Aug 13, 2013

My kids start school in two weeks so I'm in full shopping mode this week since next week is filled with orientations and last minute dental appointments. All three of the kids need new shoes and backpacks. I didn't plan on buying all of them new backpacks, but my two oldest boys said they smell really bad. The backpacks, not them. Although, that just reminded me to buy my oldest deodorant and body spray. Yep, he's at the stinky boy age. I really don't want to know why their backpacks smell horrible, but I will just take their word for it and get them new ones. My little guy is starting kindergarten this year and said he needs a backpack with his name on it just in case he forgets which one is his. I think he's more afraid that someone will take it. That's what happens when you have two older brothers.

Anyway, I went to pick up some new Ziploc lunch containers since mine are a little ragged. They are Bento-like without the Bento price. I've been using these for a few years and I absolutely love them. The only complaint I have is that they are a little long and don't fit in all lunchboxes.


I happened to notice these instead at Wal-Mart. They are a much better size and the best part is no ice pack is needed since the middle tray serves as one. I believe they were $8.97 each.


Here it is taken apart. The white container can hold a sandwich or salad, not that my kids would ever touch a salad. The smaller containers in the middle sit in the ice pack.


I was a little worried my five year old wouldn't be able to take it apart so we gave it a test run last night and he had no problem. I don't think young preschoolers would be able to undo the side tabs because they are a little tough. I'm excited to use these and will let you know how they work out in a few weeks.

If you remember, I've had so many problems with the kids coming home after school and throwing their backpacks and shoes all over the front entryway. I finally figured out a solution! I've always wanted them to use the garage to come in and out of the house, but I couldn't figure out how they could get in from outside. I found an inconspicuous keypad that's installed outside to open the garage door. I've obviously been living under a rock because every single person I've mentioned this to already has one. Better late than never!


When I get my younger two boys off the bus in the afternoons I'll put the five digit code in myself. My older son will be coming home later from school, but he's already memorized the code. It's also nice for latchkey kids because you don't have to worry about them keeping up with a key.

The garage door connects to our laundry room so they'll finally be able to hang up their backpacks there, too. We put the beadboard up a long time ago, but I never got around to caulking or painting it so that's why it looks a little sketchy. I also want to put up a pinboard above for school notes. Yes, these are the smelly backpacks.


If I need extra hooks in the winter for sweatshirts I can add a few in the hallway that connects the great room and laundry room.


I don't have room for shoes, but I do plan on getting them a three tiered wire shelf to go in the garage. I prefer they take their shoes off outside anyway so I'm okay with not having room for shoe storage in the laundry room. The best part is that I don't have to worry about Mario taking off with their shoes. I'm crossing my fingers this plan works out!


Operation Landscape

Aug 5, 2013

I had planned to add grass to our barren backyard and make it look as neat and presentable as possible until next spring. That's when I figured it would be the best time to have a professional landscaper come in since the extremely hot weather isn't the best for plants right now. Landscaping is not something I have succeeded at anyway...ever. It's just one of those things that's best left to the professionals in my household. But, I happened to notice a sign at Houston Garden Center advertising 70% off all plants and trees. I had to check it out even though I didn't really believe everything would be that cheap. It was! Actually, it still is because the sale is still going on. I bought Knockout Roses for $6, boxwoods for $2, wax myrtles for $5, and huge crepe myrtles for $36. The crepe myrtles were $119 regularly. I did not completely believe the prices until I checked out at the register. We went twice on Saturday and back again on Sunday. I now have a full yard of plants for...drumroll please...$300!


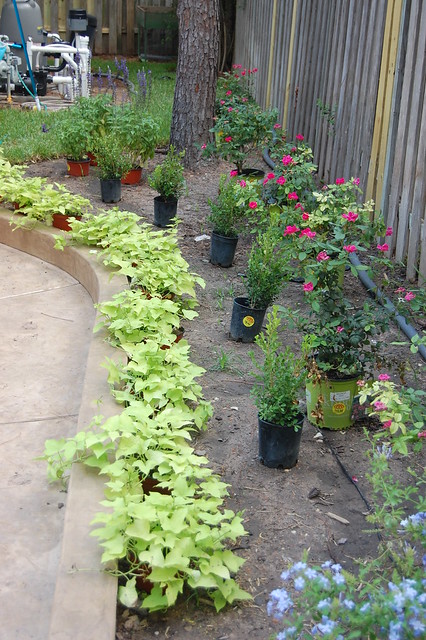
I've always love the way boxwoods look in front of roses bushes and now I have a place that's sunny enough to plant them. I also put a sweet potato vine in front of them to cascade over the small retaining wall. I initially wanted to break them up with other cascading plants, but I couldn't find anything I liked as well. I can always do that later or let a landscaper tweak it because these can be replanted somewhere else. Oh, and they were under $2 each! Since I have a black thumb, I'm going to let our yard guy plant these after he adds a bit of soil.


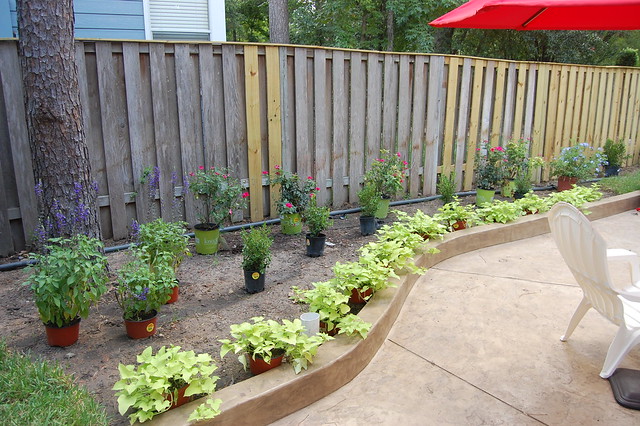
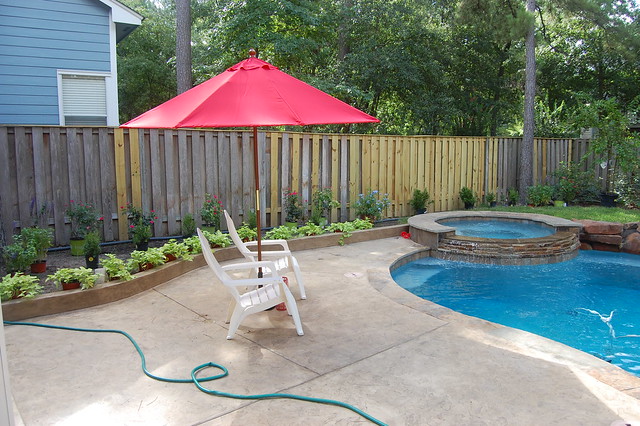
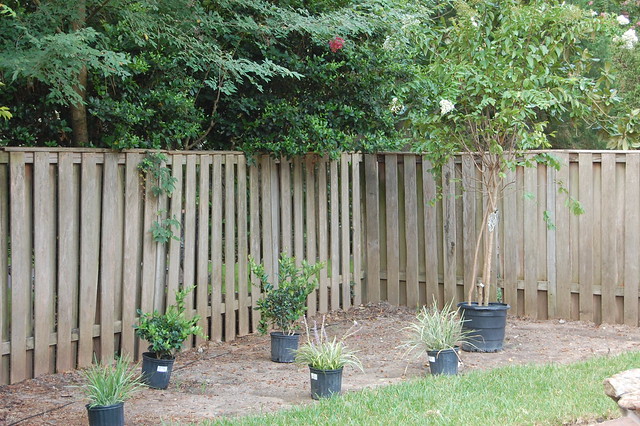
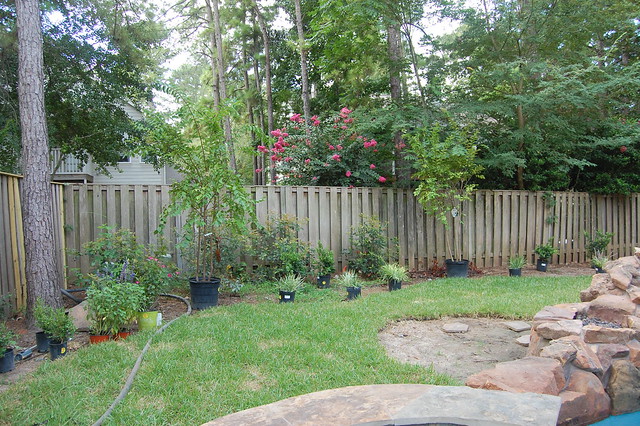
Here's the view as you walk out the back door. This is so much better than looking at mud, lol. As you can see my husband has repaired the fence. We saved so much money doing it ourselves and it really didn't take much time. He worked on it for two days, but only spent a couple of hours each day on it since we had thunderstorms that weekend. My plan is to eventually have the fences completely covered up by plants. The roses aren't going to be quite tall enough so I would love to plant something that climbs on the fence. I love the idea of honeysuckle, but I'm not sure if I want to attract every bee in the neighborhood. Oh, and have you heard about the killer bee attacks lately? Terrifying!


The other side of the fence might look a little wimpy in comparison, but these wax myrtles grow to be 12 feet tall. I love the privacy that these will give us. Another benefit is that it will hide the extreme slope next to the fence since they grow so large. According to the salesperson at the garden center, they will take about a year to get halfway up the fence. So, two years to cover the fence? Well, if I don't kill them by then they might get that tall.


We have a couple on the other side of the fence, too.


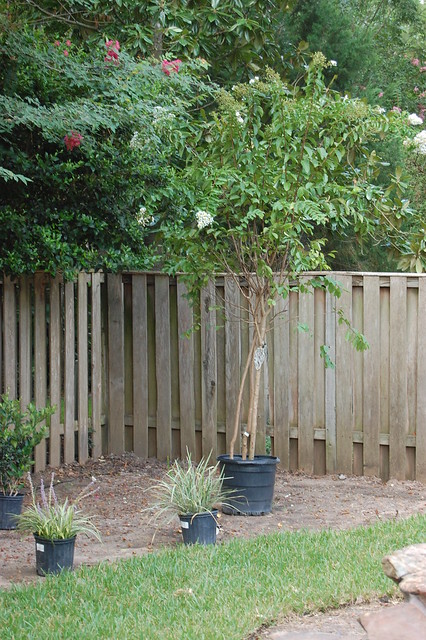
And the best deal ever! Can you believe this crepe myrtle was only $36? Look how tall that sucker is. It rivals my neighbors been-there-forever pink crepe. I decided on the white because I've heard people complain that the brighter flowers can stain concrete and pool plaster.


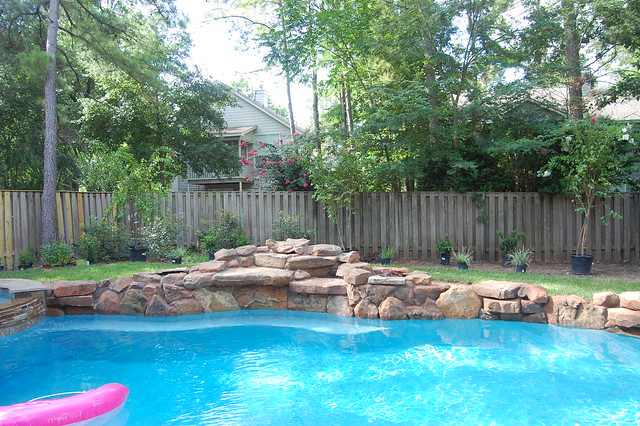
Of course, I couldn't buy just one. I bought three for the back fence. I'd also love to have them along the side fences, but the amount of flowers they drop that close to the pool changed my mind.


I bought a few filler shrubs, too. The dark green ones in the back get very large. It's also the same as our neighbor's shrubs that are peeking over the fence. I got my inspiration from what I see in my own neighborhood instead of gardens I love in pictures. The plants I've killed in the past probably weren't really meant to be planted in this climate and soil. I'm talking about you, hydrangeas!


This corner of the yard is storing all of the plants we didn't have room for, but it will be the same as the other side because I'm not creative enough to go asymmetrical and make it look good.

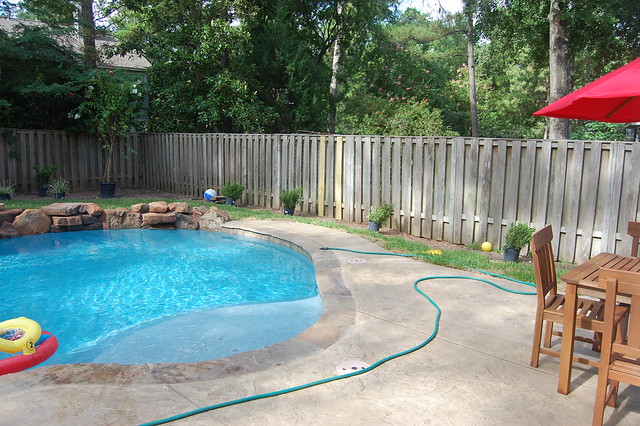
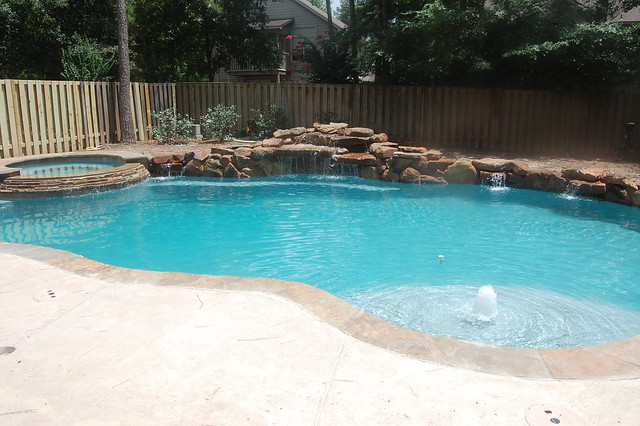
Do you see that huge hose lying on the ground? That's a temporary main electricity line. Yesterday, our power went out except for in two upstairs bedrooms. We called everyone-the pool guy, an electrician, and finally the electric company. Our first thought was that the breaker was overloaded, but we finally paid the emergency electrician fee to find out for sure last night. He immediately said the main underground line was not working. When we told him that the pool was only completed two weeks ago he said he was pretty sure it was nicked during the digging and they unsuccessfully tried to repair it. That doesn't surprise me since they cut our internet line and never said a word about it. Thankfully, our electric company is the only ones who fix this free of charge. If we lived 10 minutes south in a different county (and different provider) we would have had to pay $3000-4000 to have it fixed! I'm sure it would have been a mess because when we told our pool builder about it he immediately said it wasn't them. Okay...it's quite the coincidence the main line stops working a few weeks later. Anyway, the electrician was so nice and called our electric company for us to have someone come out last night. Despite the extremely high service fee, I can say it was well worth it to have air conditioning!


Just to recap, remember what this yard looked like just a few weeks ago?


And, now...


What a difference! I might not be very good at landscaping, but it's a definite improvement. I can't wait to see the plants in the ground and the flowerbeds mulched.

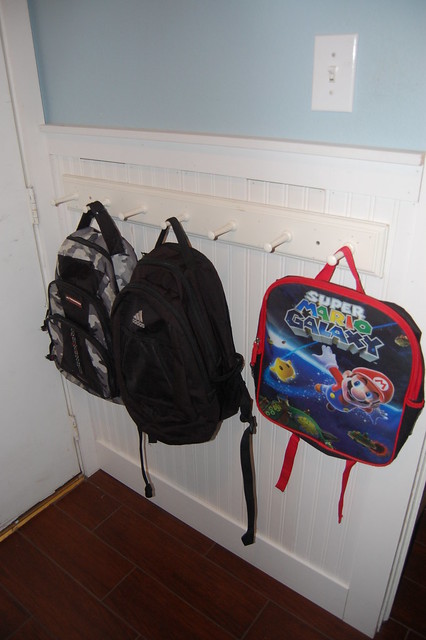
Mario is really loving having a backyard again. Keep on christening the yard instead of my rugs, boy!


A before of the side yard.


Now


Can you believe all of these plants only cost $300? That's crazy! If you live in the Houston area, run to Houston Garden Center. I bet everyone is clearancing out plants right now though. It might not be the best time of year for planting, but it certainly is the best on your wallet!